


How to Install Double Hung Windows
When you are involved in a new home construction – or even a partial remodel – window installation is often necessary to complete the job. A common home improvement project involves the installation of double hung windows, which are a popular choice. First, it’s important to begin with a replacement window that you trust. More homeowners trust and recommend the Andersen® family of brands than any other brand of windows and patio doors. (Based on 2016 homeowner brand survey; Andersen family of brands aggregated.)
Andersen® double hung windows come with many benefits:
- Great ventilation (both top and bottom portions can open)
- Excellent choice for rooms that face walkways, porches or decks (they don’t open outward)
- Easy to clean (both sides of the window are accessible from the inside)
- Safer for kids (can open from the top)
- Versatility (Andersen Double Hung Windows come in a variety of styles and materials to match any taste or budget)
How to install an Andersen® Double-Hung Window Insert:
This article is an overview for interior installation of Andersen® 400 Series Woodwright and 400 Series Tilt-Wash Double-Hung Insert Windows.
- Complete downloadable installation guide
- If your project involves a different model Andersen Double Hung Window, find the proper installation guide with the help of the installation guide configurator
Tools Needed:
|
Supplies Needed:
|
1. Check Measurements 
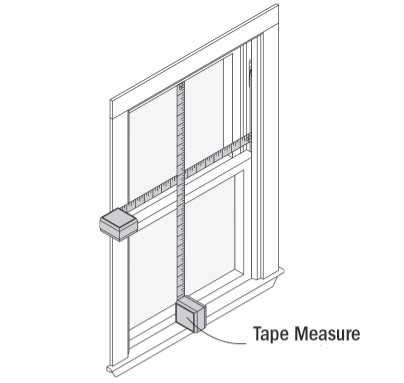
Check measurements before starting to confirm correct unit size, and verify that your opening is structurally sound.
Measure your existing window with a tape measure to make sure your insert is the correct size. To allow for installation clearance, the new window should be:
- 3/8” narrower than the opening width
- ¼” narrower than the opening height
Also, visually examine the window frame to see if it is structurally sound. Look for water damage, warping or loose frame components. If any these are present, you may need to consider conventional window replacement, which involves removal of the frame.
2. Remove Old Stops & Sash
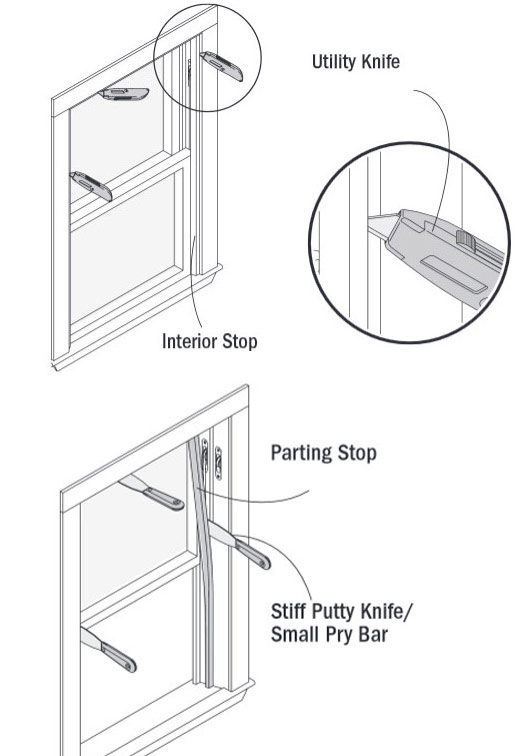 2. Remove Old Stops & Sash
The stops keep the sash in place. You can use a utility knife to break the varnish or paint seal along interior stops. Be careful not to cause damage to the stops.
You will use the stops later to secure the sash, so keep them handy!
If you have an old window with cords or chains, you will need to cut them to remove the bottom sash. Cut bottom sash balance cords (if present).
After removing the bottom sash, remove the parting stops with a stiff putty knife. Discard properly.
Next, slide down the top sash and cut balance cord (if present). Remove the top sash, and any pulleys and weights (if present). Fill weight pocket voids with insulation and reapply covers.
3. Clean Opening & Apply Sealant
Clean opening of any loose debris. Apply 3/8″ beads of sealant to sill:
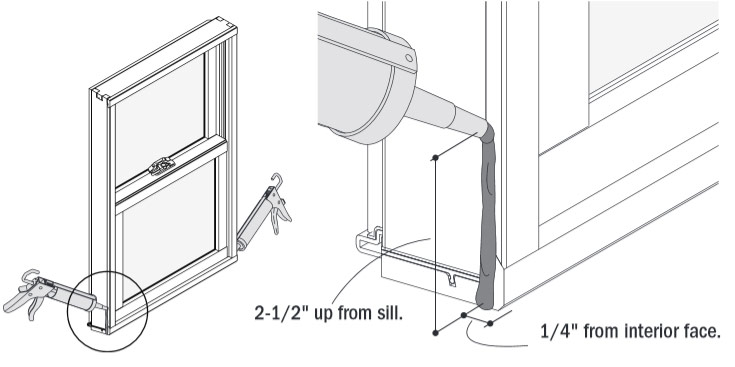
Apply 3/8″ bead of sealant to each side jamb:
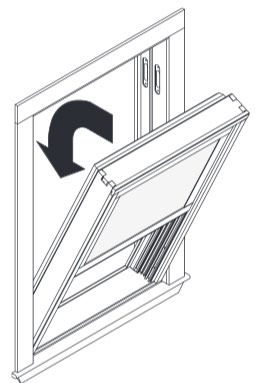
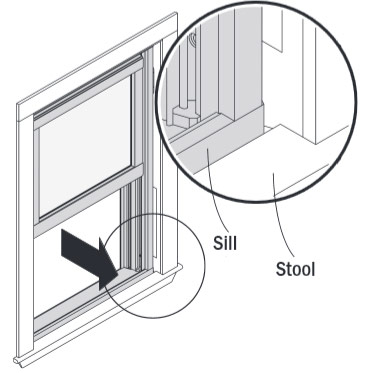
4. Insert Window
Raise the bottom sash and tip the new window into place:
Then pull the sill tight to the stool:
Fasten 2” screws through pre-drilled holes in liner and frame but do not fully tighten. Check that the window is level and square.
5. Insert Shims & Tighten Screws
If your new window is not level and square, shim is needed. Insert shims until level, then tighten all installation screws. Test upper and lower sashes for proper operation.
6. Insulate & Apply Stops
 For maximum energy efficiency, loosely pack fiberglass batt insulation around the perimeter of the window. Do not overpack insulation.
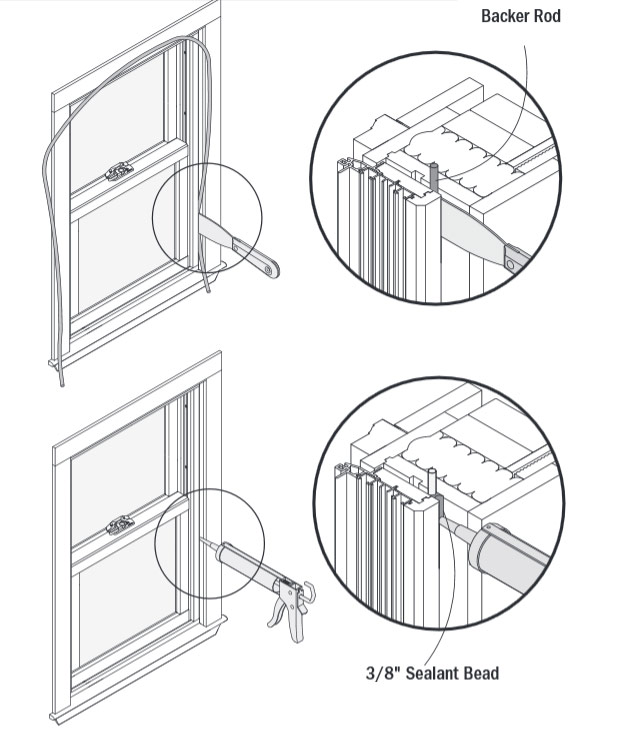
Apply interior stops, and insert the foam backer rod between the interior frame and the opening with a chisel. This seals the perimeter gap. Next, apply sealant to the interior perimeter.
On the exterior: insert the foam backer rod between the frame and the opening with a chisel, splitting the backer rod if necessary. This seals the perimeter gap. Next, apply sealant to the full exterior perimeter, and insert exterior stop covers. Finally, apply a bead of sealant between the exterior casing and the stop covers.
7. Enjoy Your New Insert Window!
The only thing left to do is step back and enjoy the view from your beautiful new double hung window!
For 20 years running, builders have used Andersen® windows more than any other brand. (Hanley Wood Builder Brand Use Study 1998-2017, Windows – Wood & Clad-Wood Category).
Missed a step? Not a problem! Watch the installation video:

Sources: https://www.andersenwindows.com/-/media/aw/files/technical-docs/installation-guide/installationguide-0005437.pdf, https://www.andersenwindows.com/support/installation-guide-configurator/
Do you have an inside door project? Our Interior Door Installation Guide offers guidance and a helpful overview of products to help you get the process started:


 Employee Access